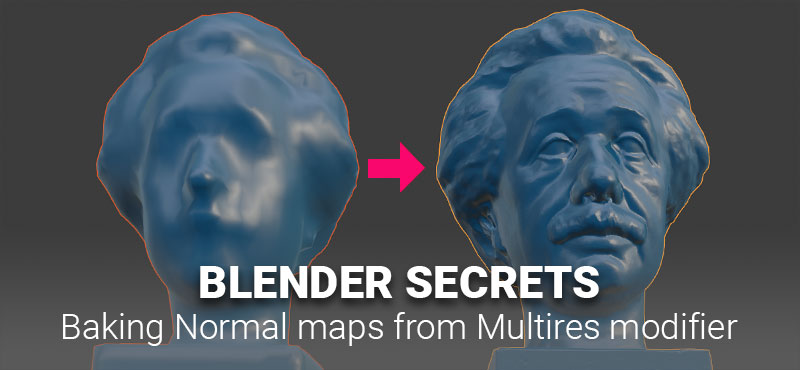
Elevating 3D Models: A Comprehensive Guide to Normal Map Baking in Blender
Related Articles: Elevating 3D Models: A Comprehensive Guide to Normal Map Baking in Blender
Introduction
In this auspicious occasion, we are delighted to delve into the intriguing topic related to Elevating 3D Models: A Comprehensive Guide to Normal Map Baking in Blender. Let’s weave interesting information and offer fresh perspectives to the readers.
Table of Content
- 1 Related Articles: Elevating 3D Models: A Comprehensive Guide to Normal Map Baking in Blender
- 2 Introduction
- 3 Elevating 3D Models: A Comprehensive Guide to Normal Map Baking in Blender
- 3.1 Understanding Normal Maps: Unveiling Surface Geometry
- 3.2 The Power of Baking: Compressing Detail into Textures
- 3.3 The Process of Baking in Blender: A Step-by-Step Guide
- 3.4 Optimizing the Baking Process: Techniques and Considerations
- 3.5 Addressing Common Challenges: Troubleshooting Normal Map Baking
- 3.6 FAQs about Normal Map Baking in Blender
- 3.7 Tips for Effective Normal Map Baking in Blender
- 3.8 Conclusion: Leveraging Normal Map Baking for Enhanced Visuals
- 4 Closure
Elevating 3D Models: A Comprehensive Guide to Normal Map Baking in Blender

In the realm of 3D modeling and rendering, achieving realistic and visually compelling results often hinges on the meticulous portrayal of surface detail. While high-resolution models can capture intricate geometry, they come with a significant computational cost, impacting rendering speed and potentially hindering real-time applications. This is where the technique of normal map baking emerges as a powerful tool, enabling artists to retain the visual richness of detailed models without compromising performance.
Understanding Normal Maps: Unveiling Surface Geometry
At its core, a normal map is a texture image that encodes surface normals—the direction a surface faces—for each pixel. Imagine a surface with bumps, grooves, or intricate patterns. A normal map captures this detail by storing information about the direction of each point on the surface, effectively creating a virtual representation of its geometry.
When a renderer encounters a normal map, it uses the encoded information to manipulate the direction of light interacting with the surface. This creates the illusion of depth and detail, even when the underlying model is relatively simple.
The Power of Baking: Compressing Detail into Textures
Normal map baking is the process of extracting the surface detail from a high-resolution model and transferring it into a normal map texture. This allows artists to work with a simplified, low-resolution model for rendering, while retaining the visual richness of the original high-resolution model through the baked normal map.
Why bake normal maps?
- Reduced Polygon Count: Baking allows artists to significantly reduce the polygon count of their models, leading to faster rendering times and improved performance in real-time applications.
- Enhanced Detail: Normal maps can capture intricate details that would be impossible or impractical to model directly, such as fine scratches, wrinkles, or intricate patterns.
- Flexibility and Reusability: Baked normal maps can be applied to multiple objects, providing a versatile way to add detail without needing to remodel each asset individually.
- Optimized Workflow: Baking simplifies the workflow by allowing artists to focus on creating high-quality models and textures, rather than spending time meticulously modeling every detail.
The Process of Baking in Blender: A Step-by-Step Guide
Blender, a widely-used open-source 3D creation suite, offers powerful tools for baking normal maps. Here’s a detailed breakdown of the process:
-
Preparing the Model: Begin by creating or importing the high-resolution model that contains the desired level of detail. Ensure the model is properly scaled and centered in the scene.
-
Creating a Low-Resolution Model: Duplicate the high-resolution model and simplify it by reducing the polygon count. This simplified version will be used as the base model for rendering.
-
Applying Materials: Assign appropriate materials to both the high-resolution and low-resolution models. These materials should include the desired surface properties, such as color, texture, and roughness.
-
Setting Up the Bake: Navigate to the "Bake" tab in the Properties Panel. Select "Normal" as the bake type and choose the low-resolution model as the target object. Specify the high-resolution model as the source object.
-
Adjusting Bake Settings: Carefully adjust the bake settings to achieve the desired level of detail and quality. Parameters like "Margin" and "Bake Resolution" influence the accuracy and resolution of the baked normal map.
-
Performing the Bake: Click the "Bake" button to initiate the baking process. Blender will analyze the geometry of the high-resolution model and transfer the surface detail onto the low-resolution model in the form of a normal map.
-
Applying the Baked Normal Map: Once the baking is complete, the generated normal map will be saved as a texture. Apply this texture to the low-resolution model’s material, ensuring the "Normal" slot is selected.
-
Rendering and Validation: Render the scene to visualize the baked normal map’s effect on the final result. Evaluate the level of detail and accuracy of the baked normal map, making adjustments to the bake settings if necessary.
Optimizing the Baking Process: Techniques and Considerations
To ensure optimal results and avoid potential pitfalls during normal map baking, consider these techniques and best practices:
- UV Unwrapping: Properly unwrapping the model’s UV coordinates is crucial for achieving accurate and seamless normal maps. Ensure that UV islands are organized logically and avoid overlapping or stretching.
- Model Topology: The topology of the high-resolution model plays a significant role in the quality of the baked normal map. Avoid sharp angles, excessive geometry, or inconsistent topology, as these can lead to artifacts or distorted results.
- Bake Resolution: Choose an appropriate resolution for the baked normal map, balancing detail and performance. Higher resolutions offer greater detail but increase file sizes and processing demands.
- Margin Settings: The "Margin" setting in the bake options determines the distance between the high-resolution and low-resolution models. Adjust this value to ensure that all necessary detail is captured without introducing artifacts.
- Bake Type: While "Normal" is the most common bake type, Blender also offers options like "Tangent" and "Ambient Occlusion." Consider using these options based on specific requirements or desired effects.
Addressing Common Challenges: Troubleshooting Normal Map Baking
During the baking process, artists may encounter various challenges that require troubleshooting. Here are some common issues and potential solutions:
- Artifacts: Artifacts can appear as jagged edges, banding, or other visual distortions. These issues often arise due to incorrect UV unwrapping, problematic model topology, or insufficient bake resolution. Re-evaluate the model’s UVs, adjust the bake settings, or refine the model’s geometry to address these artifacts.
- Missing Detail: If the baked normal map fails to capture all the desired details, ensure that the "Margin" setting is sufficient to encompass all relevant geometry. Additionally, check for overlapping UVs or inconsistent topology that might be blocking the transfer of detail.
- Performance Issues: Baking high-resolution models can be computationally demanding, especially for complex scenes. Consider optimizing the scene by simplifying geometry, reducing the resolution of the baked normal map, or using a more efficient baking method.
FAQs about Normal Map Baking in Blender
Q: What is the difference between a normal map and a bump map?
A: Both normal maps and bump maps are used to simulate surface detail. However, normal maps encode surface normals directly, providing more accurate and realistic results. Bump maps, on the other hand, use a grayscale image to represent the height of the surface, leading to less precise detail and potential artifacts.
Q: Can I bake normal maps for multiple objects simultaneously?
A: Yes, Blender allows baking normal maps for multiple objects simultaneously. Ensure that the objects share the same UV coordinates and are properly grouped in the scene.
Q: How do I choose the right bake resolution for my project?
A: The optimal bake resolution depends on the level of detail required, the target platform, and the desired performance. Experiment with different resolutions to find the balance between visual quality and efficiency.
Q: What are the limitations of normal map baking?
A: While normal map baking is a powerful technique, it does have limitations. It cannot create self-shadowing or accurately represent complex geometry like thin, transparent objects. Additionally, baking can introduce artifacts if not performed correctly.
Tips for Effective Normal Map Baking in Blender
- Use High-Quality Textures: The quality of the baked normal map is directly influenced by the quality of the textures used for the high-resolution model.
- Simplify the Scene: Before baking, remove unnecessary objects or elements from the scene to improve performance and reduce the risk of artifacts.
- Use a Separate Layer: Create a separate layer for the low-resolution model to avoid accidentally modifying the original high-resolution model.
- Test Regularly: Render the scene frequently during the baking process to check the results and make adjustments as needed.
- Experiment with Settings: Don’t be afraid to experiment with different bake settings to find the optimal configuration for your project.
Conclusion: Leveraging Normal Map Baking for Enhanced Visuals
Normal map baking in Blender is a valuable tool for artists seeking to enhance the visual fidelity of their 3D models without sacrificing performance. By leveraging this technique, artists can achieve highly detailed and realistic surfaces while working with simplified models, ultimately improving workflow efficiency and rendering speed. Mastering the principles and best practices outlined in this guide empowers artists to harness the power of normal map baking, pushing the boundaries of visual realism in their 3D creations.


Closure
Thus, we hope this article has provided valuable insights into Elevating 3D Models: A Comprehensive Guide to Normal Map Baking in Blender. We appreciate your attention to our article. See you in our next article!