Navigating the Road Ahead: A Comprehensive Guide to Post-MAP Sensor Replacement
Related Articles: Navigating the Road Ahead: A Comprehensive Guide to Post-MAP Sensor Replacement
Introduction
With enthusiasm, let’s navigate through the intriguing topic related to Navigating the Road Ahead: A Comprehensive Guide to Post-MAP Sensor Replacement. Let’s weave interesting information and offer fresh perspectives to the readers.
Table of Content
Navigating the Road Ahead: A Comprehensive Guide to Post-MAP Sensor Replacement

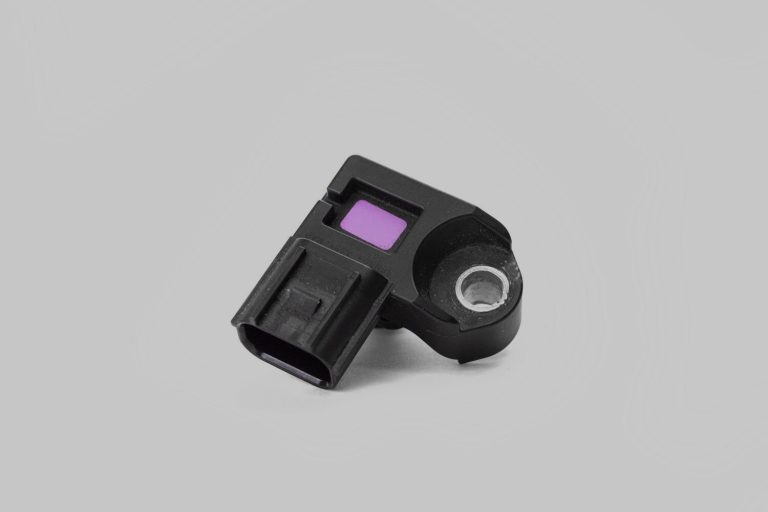
The manifold absolute pressure (MAP) sensor plays a crucial role in a vehicle’s engine management system. It measures the pressure within the intake manifold, providing the engine control unit (ECU) with vital information to regulate fuel injection and ignition timing. Replacing a faulty MAP sensor can significantly improve engine performance, fuel economy, and overall drivability. However, the process doesn’t end with the replacement itself.
This guide will provide a comprehensive understanding of the steps to take after replacing a MAP sensor, ensuring a smooth transition and optimal engine performance.
Understanding the Importance of a Post-Replacement Check
A newly installed MAP sensor requires proper initialization and calibration to ensure accurate readings and optimal engine operation. This process is crucial for the following reasons:
- Accurate Fuel Delivery: The MAP sensor provides the ECU with the necessary data to determine the appropriate amount of fuel to inject into the cylinders. A malfunctioning sensor can lead to fuel-related issues such as poor acceleration, rough idling, and excessive fuel consumption.
- Precise Ignition Timing: The MAP sensor also influences ignition timing, ensuring optimal combustion. A faulty sensor can result in misfires, engine knocking, and reduced power output.
- Enhanced Emissions Control: The ECU uses MAP sensor readings to optimize the air-fuel ratio, minimizing harmful emissions. A faulty sensor can lead to increased emissions, potentially failing emissions testing.
Post-Replacement Procedures: A Step-by-Step Guide
- Clear the Diagnostic Trouble Codes (DTCs): The first step is to clear any fault codes related to the MAP sensor stored in the ECU’s memory. This can be done using a scan tool or by disconnecting the battery for a few minutes.
- Start the Engine and Monitor for Issues: Once the codes are cleared, start the engine and observe its performance. Look for any signs of rough idling, stalling, or hesitation.
- Check for Vacuum Leaks: A vacuum leak can significantly affect MAP sensor readings, leading to inaccurate data and engine problems. Inspect all vacuum lines and connections for cracks, leaks, or loose connections.
- Test Drive and Analyze Performance: After a thorough inspection, take the vehicle for a test drive. Pay attention to the engine’s response, acceleration, and overall drivability.
- Recalibration (If Necessary): Some vehicles require a recalibration of the MAP sensor after replacement. This process involves using a scan tool to adjust the sensor’s readings to match the specific engine parameters.
Addressing Common Post-Replacement Issues
While a new MAP sensor typically resolves engine problems, some issues might persist. Addressing these issues is crucial for optimal engine performance.
- Engine Stalling or Rough Idling: These symptoms can indicate a faulty MAP sensor, a vacuum leak, or other underlying engine issues.
- Poor Acceleration or Power Loss: A faulty MAP sensor can cause reduced power output and sluggish acceleration.
- Increased Fuel Consumption: A malfunctioning sensor can lead to excessive fuel consumption due to incorrect fuel delivery.
- Check Engine Light: If the check engine light remains illuminated even after replacing the sensor, there might be other issues with the engine management system.
FAQs: Addressing Common Concerns
Q: How long does it take for a new MAP sensor to "learn" the engine?
A: There is no specific "learning" period for a new MAP sensor. It should start working correctly immediately after installation. However, the ECU might need some time to adjust to the new sensor readings, especially if the old sensor was significantly faulty.
Q: Is it necessary to recalibrate the MAP sensor after replacement?
A: Recalibration is not always required. Some vehicles automatically adjust to the new sensor, while others might need a specific procedure using a scan tool. Refer to the vehicle’s owner’s manual or consult a qualified mechanic for specific instructions.
Q: Can a faulty MAP sensor cause damage to other engine components?
A: While a faulty MAP sensor itself won’t directly damage other components, its inaccurate readings can lead to issues like misfires and lean conditions, which can potentially damage the engine over time.
Q: Can I replace the MAP sensor myself?
A: Replacing a MAP sensor is a relatively straightforward task for those with basic mechanical skills. However, if you are unsure, it’s always best to consult a qualified mechanic.
Tips for Maximizing Performance After Replacement
- Use High-Quality Parts: Choose a reputable brand and ensure the new MAP sensor is compatible with your vehicle.
- Inspect Associated Components: While replacing the sensor, take the opportunity to inspect other components in the intake system, such as vacuum lines and hoses, for signs of wear or damage.
- Regular Maintenance: Regular engine maintenance, including oil changes, air filter replacements, and fuel system cleaning, can prevent future issues and optimize engine performance.
Conclusion
Replacing a faulty MAP sensor can significantly improve engine performance and efficiency. However, a proper post-replacement check is crucial to ensure the new sensor is functioning correctly and the engine is operating optimally. By following the steps outlined in this guide, you can ensure a smooth transition and enjoy the benefits of a well-functioning engine. Remember, if you encounter any persistent issues or are unsure about any aspect of the process, consult a qualified mechanic for professional assistance.
![Audi 3.0L V6 TFSI MAP Sensor Replacement [Complete Guide]](https://1.bp.blogspot.com/-W5pzgOPVsX4/X0ZxUv4s_1I/AAAAAAAASHU/Mt1iVeCHOIoZjp3tyXuVzrsXVg32B3ApgCLcBGAsYHQ/w680/Audi_S5_3.0L_V6_TFSI_MAP_Sensor_Top_Image_3.jpg)


Closure
Thus, we hope this article has provided valuable insights into Navigating the Road Ahead: A Comprehensive Guide to Post-MAP Sensor Replacement. We thank you for taking the time to read this article. See you in our next article!